

Welcome to Birdbuddy 2!
Your new Birdbuddy is here to make connecting with nature even easier.
Whether you’re setting it up for the first time or fine-tuning your camera, here’s everything you need to get started and make the most of your new experience.

Rotate your camera 90° before placing it in the battery holder. It will lock in place, and the app will adjust orientation automatically.
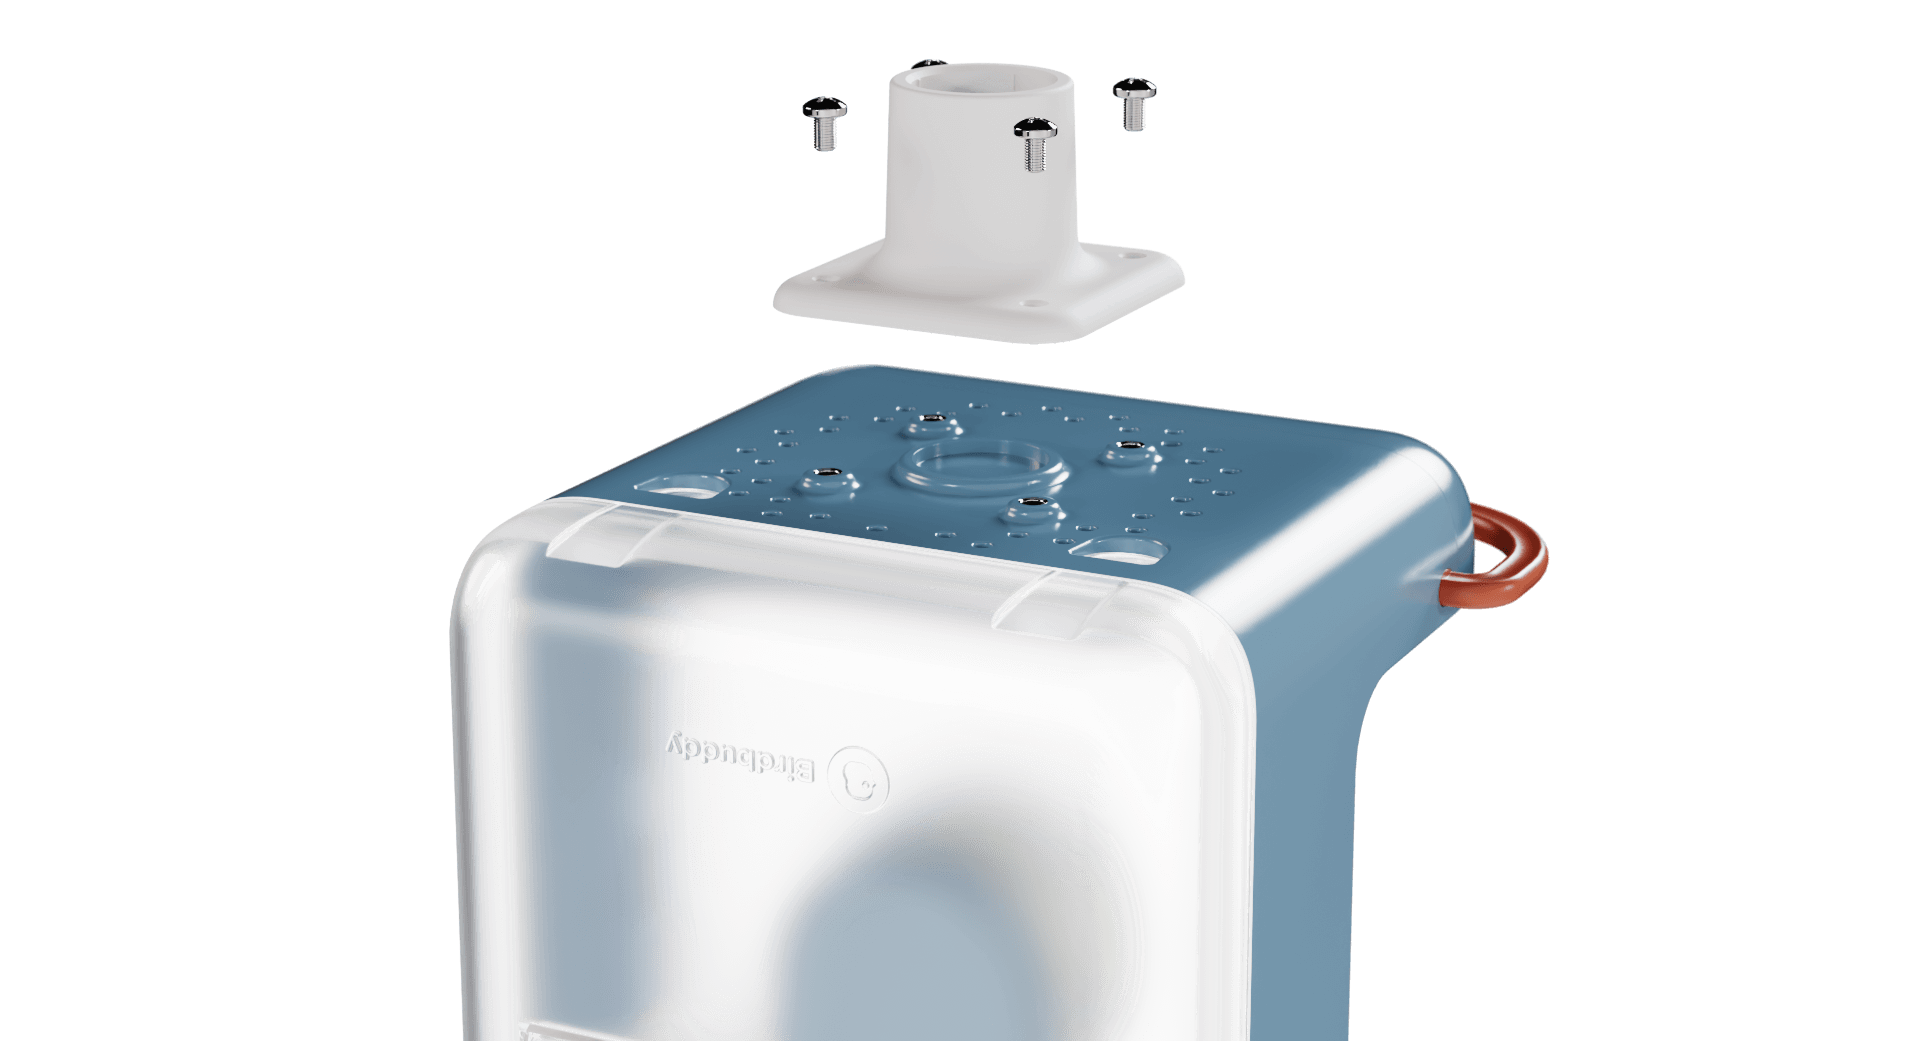
Find the perfect spot and follow our step-by-step guide to mount it securely.
There are two ways to charge the battery:
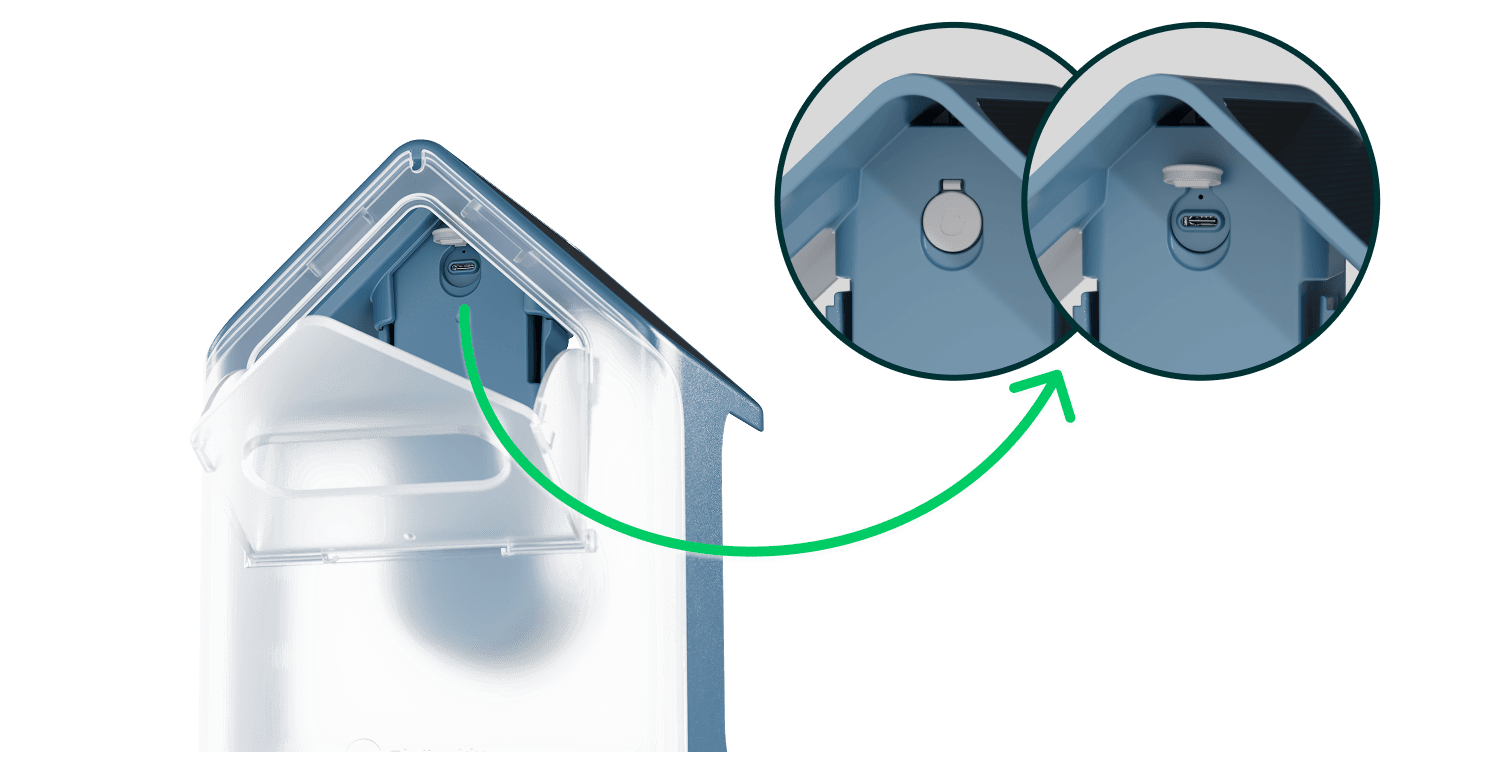
1. Charge the battery by opening the back panel, lifting up the flap protecting the USB-C port, and charging the battery for 4-5 hours.
- Status light: a small light above the port glows orange while charging and turns green when fully charged.
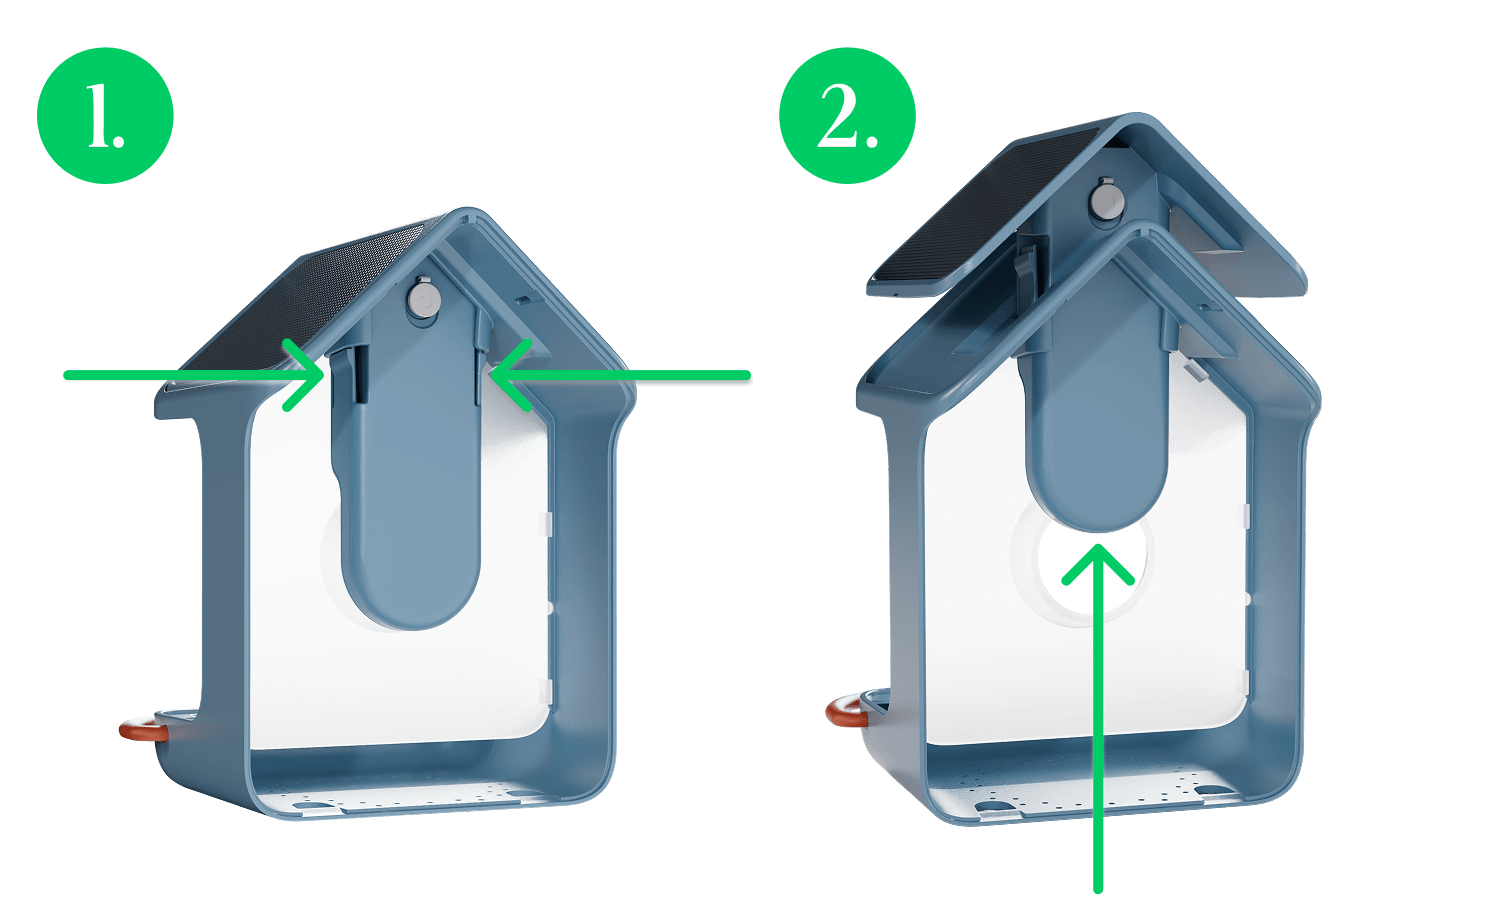
2. You can remove the battery and solar insert from the housing.
- First, open the back panel to access the battery pack.
- There are two snaps located on each side of the battery insert. To remove the insert, press both snaps simultaneously and lift up the solar roof and battery insert.
- Lift up the flap protecting the USB-C port and plug the battery in for 4-5 hours.
- Status light: orange while charging, green when fully charged.

Manage everything from the Cameras tab. Choose your power mode to decide how often you get postcards, adjust your media quality, and check your camera position with a livestream.
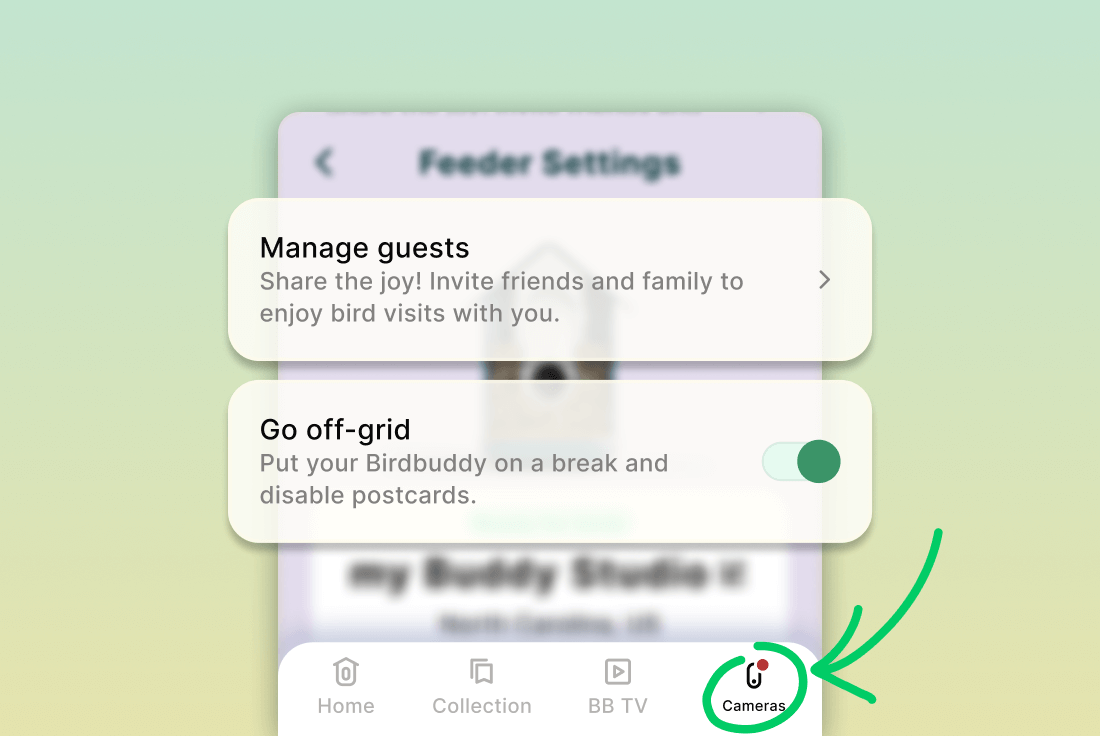
Invite friends to enjoy visits with you or switch to off-grid mode to pause postcard creation for a while.
Optimization updates
As you get started with your Birdbuddy 2, upcoming updates will ensure that each visit becomes smoother and more enjoyable, with a few already rolling out.
Want to know more about your camera?
Visit our Help Center to learn more about your Birdbuddy camera and its features, including orientation, power modes, and media settings.
If you ever need a hand, you can also contact us - we’re happy to help!
Want to know more about your camera?